Loading sample company data
The sample Dynamics GP
company, Fabrikam, can be used for testing as well as training. Follow
the steps below to add the sample company to your Dynamics GP
installation:
1. Choose Add sample company data from the drop-down list on the Dynamics GP Utilities Additional Tasks window and click Process:

2. The Database Setup
window will let you change the locations for the data files if you do
not want to use the default locations. This process will create a SQL
Server database called TWO containing the sample company data. The company itself will be called Fabrikam. (The TWO
database name comes from older versions of Dynamics GP where the sample
company was called The World Online.) Note that, as with the DYNAMICS database, you cannot change the name of the physical files for the TWO database. Click Next to continue.
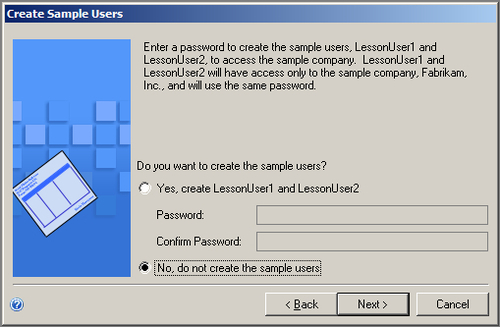
3. On the Create Sample Users window decide whether you would like the system to create LessonUser1 and LessonUser2 Dynamics GP users for you. If so, enter and confirm a password for them. Otherwise, choose No, do not create the sample users and click Next.
4. A Confirmation window will list all the settings you have selected, click Finish to start the creation of the TWO SQL Server database and Fabrikam company with sample data.
5. Once the sample company is loaded, the Additional Tasks window will open again.
At this point the Dynamics
GP Fabrikam company is populated with sample data and is ready to use
for training and testing purposes.
Creating a new Dynamics GP company
To create your own Dynamics GP company, follow these steps:
1. Click on the drop-down arrow on the Additional Tasks window, select Create a company, and click Process:

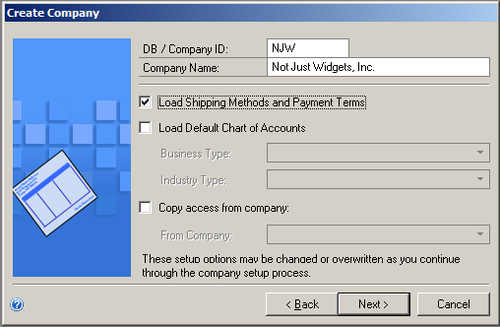
2. Enter the Company ID and Company Name on the Create Company window:
The Company ID will be used as
the SQL Server database name for your company. Remember that each
Dynamics GP company is a separate SQL Server database. The Company ID
must follow these guidelines:
Have a maximum of five characters
Can have numbers or letters
No special characters (the underscore is an exception to this, but it is not recommended)
Must start with a letter (so A1 is ok, but 1A is not)
All capital letters should be used
Most end users will rarely, if ever, use or see the Company ID. However,
anyone involved with support, administration, or reporting for Dynamics GP
will use it extensively. If you are planning on setting up multiple companies
in Dynamics GP, try to make the Company IDs distinctive so that it is easy
to differentiate between companies when looking at a list of databases. The
Company ID cannot be changed once created.
The Company Name is what will show up on every window in Dynamics
GP and on a list of available companies when users log into Dynamics GP.
As with the Company ID, if there are multiple companies being setup, try to
make them easy for users to differentiate between. If the company name is
very long, consider using a shorter version or an abbreviation. The company
name can be changed at any time after the company is created.
Additional options on the Create Company window are:
Load Shipping Methods and Payment Terms:
Choosing this option will populate your company with a short list of
predefined payment terms and shipping methods. They can always be
deleted from the Dynamics GP user interface later and may provide a good
starting point.
Load Default Chart of Accounts:
This option will automatically create a General Ledger Chart of
Accounts in the new company. As the Chart of Accounts is one of the
critical building blocks of the Dynamics GP system, using a default is
not recommended.
Copy access from company:
For companies created in the future, this is sometimes a useful option
to copy security access from an existing company to a new one. As there
is no security set up yet, this option is not available and choosing it
will result in an empty drop-down list.
Once you have made your selections, click Next to continue.
3. On the Database Setup
window choose the file names and locations for the SQL Server database.
Even though you can change the physical file names for your company
databases, it is recommended that you leave them as defaulted, so that
all the Dynamics GP databases have consistent naming.
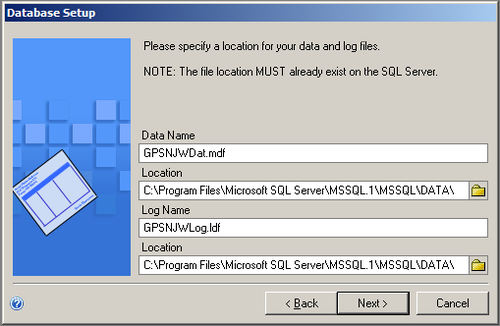
Click Next to continue.
4. The Confirmation window will list all the options you have chosen. Use the Back button if you need to make any changes, otherwise click Finish to start creating your new company.
5. The Server Installation Progress window will open to show you the steps and progress.
6. Once the company is created, the Company Setup Options window will open offering options for setting up your company. Choose Set up the company later. and click Next:
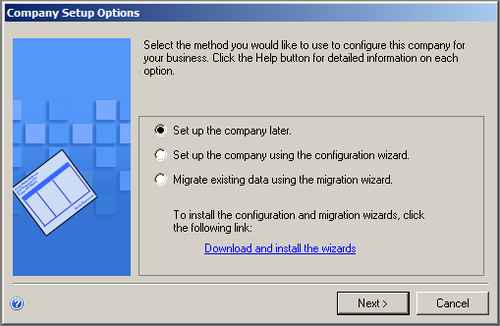
The new company is now created and the Dynamics GP Utilities Additional Tasks window will open again.